Lesson Ideas
The Art of Questions
This article appeared in NSEAD’s AD Magazine January 2016
The Art of Questions by Paul Carney
When planning and delivering lesson content teachers are continually striving for a balance between ensuring their pupils achieve the intended learning objectives and maintaining their motivation. We can’t place enjoyment above the need to deliver good content, but in we can’t ignore it either, because creativity is dependent on motivation.
Now of course many art teachers build creative opportunities into project learning stages to facilitate personal interpretation and so improve motivation. Whilst this usually reaps considerable rewards in terms of the quality of pupils’ output, it’s still very teacher-dependent. All those long nights planning lessons and making resources, select appropriate images, objects, themes, topics, artists as starting points etc. are often counter-productive to good learning. They usually end up making your students dependent on you. Our well-intended, conscientiously over-planned projects often kill the very thing we are striving for. We dull creativity and teach learning by imitation. Pupil motivation can be lost if the teacher has done all the thinking beforehand. Sometimes all that is left is a series of instructions for students to follow. In their book Questioning in the Primary Phase, Brown and Wragg say the ability to ask intelligent and searching questions and to use questions that stimulate complex reasoning, imagination and speculation are crucial to teachers of all ages and subject groups. Research by Professor Steve Higgins for the Sutton Trust bears out the potential gain of metacognition as being equivalent to eight months academic progress, which is the most effective way of raising attainment and the cheapest.
In her book ‘Principals and Student Achievement: What the Research Says’ Education Researcher and author Kathleen Cotton says that Primary children and less able children learn when lots of lower-cognitive questions are asked that build gradually to higher cognition. In the Secondary sector she recommends you show students how to answer higher cognitive level questions and increase the frequency you ask them in order to attain higher pupil performance.
Virtually every thing you do in your classroom, every skill, every technique, every knowledge finding, idea developing, project making, material exploring thing you do can become part of a question-based model instead of a teacher-led model. If you want to transform your teaching you will need to switch your mindset away from delivering content to facilitating investigation, problem solving and inquiry. You will become someone who stops answering questions and demonstrating learning and starts helping people to find the answers themselves.
Essential questions are questions that evoke curiosity, deep thought, enquiry and reflection. They make us focus on core knowledge and values, and ensure we consider alternative options, provide evidence to support our ideas and provoke discussion. They are the driving force behind any intelligent thinking person; ‘Why am I here? What do I want to do with my life?’ and so are integral to Art and Design, because artists have struggled with similar themes throughout time.
Writing Essential Questions isn’t easy. It requires a lot more thought from the teacher at the planning stage for one thing. Even then, pupils need to be taught how to respond to a question like this, how to present an argument, show evidence and persuasion. That’s where the Foundation Questions come in, because they help to develop the pupil’s understanding of the big question and steer the outcomes. Without the supporting questions the students become confused and the outcomes chaotic. The skill with the Foundation question is to write them so that they support and steer but don’t dictate obvious outcomes. Think of them like giving clues to the answer.

Here is an example of an essential question I have written based on Arte Povera:
Is the world’s greatest art just a product for rich, intelligent people?
Supporting foundation questions:
✴ Why is some art worth millions when other art is not?
What effect does this have on artists?
What makes some art great and other art not?
✴ The Arte Povera artists in the 1960’s made art out of rubbish to attack the snobbery of the art world and the high prices of art. Many artists to this day make art from rubbish and unwanted objects and their art is worth a lot of money. How should we value art?
✴ “You owe the companies nothing. You especially don’t owe them any courtesy. They have re-arranged the world to put themselves in front of you. They never asked for your permission, don’t even start asking for theirs.” (attributed to) BANKSY.
However, Banksy’s art is now so valuable that people actually want him to graffiti on their building, so when is graffiti art good and when is it vandalism?
✴ Can beautiful art be made from rubbish?
This type of approach not only brings more interested curiosity from your pupils, but they have greater autonomy to work in ways that interest them.
Once ideas and responses begin to flow you should find an increase in eagerness to get started and this is where you need to balance the amount you hold them back with the need to think about what skills they have, what criteria their idea needs to be successfully executed and what the project learning objectives are, so that you don’t stifle that enthusiasm. This is where further questions come in and in fact, they should support every step of the process:
• Which materials will you need to make your idea?
• Have you used these before?
• How successful were you the last time you used them?
• Where can you get the help and support you need to practice the skills and techniques you need?
Throughout the process you will need regular evaluations to ask; ‘Do you need to alter and adjust your idea in light of what you’ve just done?’
You might use supportive comments from other pupils for improvement. ‘How might this person improve their work?’ Or to focus the group on something you know needs improving, direct the question thus: ‘What do you think might improve this work’. Again, the emphasis is on steering and guiding not dictating. You are supporting, showing and helping them to self-analyse through dialogue, evaluation and collaboration. Making art in this way is very different to the standard process model you may be used to. It takes time for pupils to be able to achieve the same standard of outcomes you may be used to, but it’s more exciting, dynamic and ultimately less stressful for you, because you are putting the responsibility for learning back onto the pupil where it belongs.
‘The Art of Questions’ is available from Paul’s website www.paulcarneyarts.com, and explains in more depth the theories and techniques of using questions in the art room for projects, exploring materials and developing autonomous learners.
Developing different approaches to Art
Developing different approaches to Art
It’s important, when teaching art to understand that there are many different approaches to the making process. More often than not, art teacher lean towards a ‘Teacher-led’ approach, where they plan every stage of the learning out. This is fine in many cases, but creates very dependent pupils over time. By the word approaches I don’t mean techniques, such as painting, drawing or print etc. What I’m describing is the type of activity you create.
For example you could just pick up a pencil to draw something, but draw what? If you simply copy a picture you like then we’d call that a direct approach, which means just getting on and doing an art activity. A more complex form of this approach is called active learning. But there are also other ways to approach this drawing activity. If we photograph the drawing we could import it to a computer and use software to create digital art. We could draw something from observation or we could invent an imaginary picture. All of these are different art approaches and by knowing a wide repertoire of them you can make your art lessons much more fun and exciting. In fact, you can take the same theme and adapt it in many ways simply by altering the approach you take. It really is key to improving the kind of art you teach.
And rather than reinventing the wheel when thinking of ideas for art projects, you can just adapt and refine the art activities you do already to make them fresh and interesting. For example; let’s say you are doing a project based on puppets. You might typically approach this activity like this:
- Research different puppet designs
- Create an idea for a puppet
- Make the puppet
But by applying different approaches you can really add some excitement:
- Stimulus – instead of simply showing puppet pictures, use drama and physical movement to act and move like a puppet, then make studies and drawings of these movements and poses.
- Questioning – What were some of the different reasons people made puppets? By knowing the reasons why people made puppets your pupils have a greater understanding to be able to make more meaningful puppets of their own.
- Pupil led – How would you make a puppet if you had no teacher input? This could be assemblage, where you provide a range of scrap, found objects and challenge them to make puppets from them.
- Design – ‘Design a puppet for . . .’ but add design constraints such as; ‘you must use these shapes or objects, you cannot use colour etc.’
- Artist led – Research some different puppet designs to use as influence for your own design.
- Ideas – Develop an idea for a puppet using a tennis ball as a starting point.
- Observation – Simply draw a puppet from observation, using first or second hand sources.
Do you see how it is the approaches you take that create interest, variety and stimulus? When you become familiar with different approaches you might begin to add some more of your own because there are even more than the ones I’ve mentioned here!
The eBook I’ve created describes twelve different art approaches you can use in your teaching. They will help you to redefine what you do to make it much more exciting.
Durer Drawing and Printmaking

It requires a thin piece of clear perspex about A3 in size which may or may not be divided into squares using red or blue permanent marker (the squares are great for the less able). The perspex is fixed vertically to the desk using generous blobs of blue tac, but if you are of a technical nature you might create a more sturdy frame and stand. The window is positioned in front of the item to be drawn from observation and the student draws it. You can draw it in two ways;
You can also use a digital method. Just take a photo of the still life then trace it using an app such as Tracing Paper, Calrisketch, Explain Everything etc. But its much more fun the Dürer way!
Creative Lesson Planning
Image Posted on Updated on
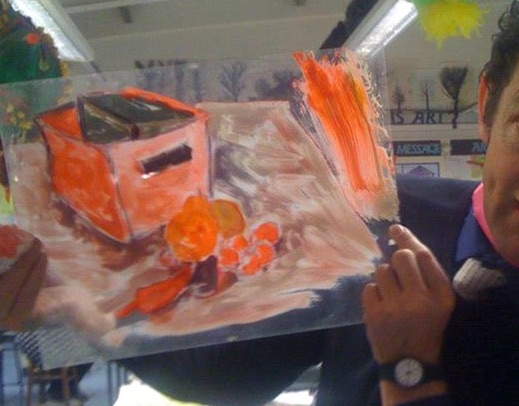
One of the ways I see creativity being stifled is when well meaning teachers plan their lessons. Instead of planning for freedom of choice, they plan very controlled experiences. Instead of encouraging risk and exploration they limit the materials to keep outcomes high. Teachers develop ‘tricks’ of the trade: i.e. how to get good outcomes, instead of focussing on which method has the most learning value. Becoming experienced at teaching shouldn’t mean only making high quality art, but rather what learning is the most valuable to the pupil and that sometimes means making some horrid art!
Many teachers work long into the night (I’ve done it myself) planning and providing everything; stimuli, visual sources, artist references, they plan every stage of the making and carefully ensure that everyone’s ability range is catered for. All that remains is for the children to turn up, behave themselves and do the art they are instructed. But planning lessons should focus on creating rich, challenging, diverse and personal learning experiences, NOT how to get the best outcomes.
Let me show you what I mean, the following lesson is an Illuminated Lettering lesson I taught to year 5 many years ago. I was really proud of the standard of outcomes and everyone congratulated me. I thought it was a good lesson for many years until I learned what I was doing:

Illuminated lettering
- Pupils studied illuminated lettering making copies in their books. DESIGN INFLUENCES ARE LIMITED AND RESTRICTIVE
- They learned the history of why and how the letters were made. INTERESTING BUT IF THEY HAD CHOICE HERE IT WOULD EXPAND CREATIVE OUTCOMES
- They used a black fineliner to copy decorative patterns and details from the letters. GOOD BUT AGAIN LIMITED TO ONE METHOD
- They used plastic stencils to draw letters of the alphabet then coloured them using paint. INCREASES QUALITY BUT LIMITS LEARNING
- The teacher showed the group how to use the colour wheel for complimentary and harmonious colours and there was a strong emphasis on carefully controlling the brush and colour mixing. VERY GOOD SKILLS LEARNING (BUT THERE ARE BETTER WAYS TO TEACH SKILLS)
- They were given photocopies of illuminated lettering that they stuck to card. SO MUCH LEARNING HAS BEEN LOST HERE. RAISING THE STANDARD OF OUTCOMES IS KILLING CREATIVITY.
- They then glued small pieces of precut card onto their letter to create a 3D raised effect. SELF EXPLORATION OF 3D WOULD BE MUCH BETTER & ALLOW THEM TO EXPLORE & DISCOVER
- They then decorated them in an illuminated style using paint and coloured paper and added patterns with black pen when dry. THIS COULD BE MADE MORE CREATIVE BY EXTENDING THE RANGE OF LETTERING AND PATTERNS.
Whilst the outcomes of this project are of a high standard, my issue with this project is that so much creativity has been lost. What is required through the whole project is that the pupils mimic the teachers’ expectations. They all desperately want to do their work ‘right’ and be neat. In addition, they haven’t learned how to draw a letter on their own or how to adapt lettering to creative intentions. It surely is better for them to draw a letter poorly than to merely work over a template or photocopy? I would want pupils to learn how to draw letters independently, whatever the standard. I’d like them to get an understanding of different letter designs and how lettering can be used as a powerful way to illustrate mood. Why can’t they explore methods of making letters look 3D themselves? It’s better fun and they learn more. It’s still good to learn those colour relationships but maybe they could decorate them after looking at a range of patterns. Above all what I’d like to see is a range of outcomes in a variety of styles. I decided to rewrite the project to try to inject more creativity. This is what I came up with:

CREATIVE LETTER DESIGN
Activity 1: Let’s investigate lettering
Magazine sources, newspapers and computers.
Discussion: Why are there so many different styles of lettering?
Activity 1: COLLECTING INFORMATION TO INFORM CREATIVE THINKING
Using the sources provided, try to answer some or all of these questions: Are some styles of lettering more suitable for different kinds of text? What is it that makes letters look different? How many different styles of lettering can u see in the sources provided? Make a collage of your favourite lettering styles. Copy your favourites into your books and colour them in your favourite art materials. Working with a partner, compare two or more different letters. Now try to describe the differences between each.
Activity 2: DISCOVERING HOW LETTERING CAN HAVE CREATIVE MEANING
Can u show feeling and emotion with letters?
Dictionary: learn the word Font.
Type the word WORD three times into a computer programme. Using ONLY the font tool, try to make each word show these moods: Crazy, angry, clever. Next, can you create more emotions with fonts? How might you now draw the following words freehand without a computer? Shy, funny, silly, loud, happy, sad. Add colour and some detail if you can.
Plenary recap: Discuss: What have we learned about lettering?
Activity 3: DEVELOPING CREATIVITY BY DESIGNING OWN LETTERING
is it possible to design original fonts of our own?
Let’s see what you know already. How would you draw your name if you were asked to draw it using lettering?
Let’s look at your results as a group and talk about them.
(Teacher assessment of ability)
Activity whole class: use (5mm) squared paper to help you design a lettering style (a font) Is it possible to make round letters and corners on squared paper? Can you still draw diagonal lines for letters such as A or W?
Less able tracing easier single sans serif letters on a scale more suitable for accuracy ie A5, then shading or colouring. More able to design higher level outcomes eg with serifs, adapting and manipulating the grid or perhaps not even needing a grid. When u finish designing your font you can name it and start using it. Write some words by tracing or copying your font them colour them with felt pens.
Plenary evaluation if outcomes where pupils suggest ways to improve designs.
Activity 4: LEARNING FROM OTHERS’ CREATIVE OUTCOMES?
Let’s investigate how artists have used lettering to create art: discuss a range of lettering from illuminated lettering to contemporary in table groups to identify: What features stand out the most? Which do you think would be hardest to draw? How has lettering changed over time?
Activity: Record by sketches and/or notes anything in the study of the lettering that you find interesting and that you might use in your own design. Would you want to change anything about your own lettering design after you have seen the artists work? How might you decorate your lettering? Reconsider the design and/or practice writing it in freehand. (Notice I haven’t asked them to make copies of other lettering styles, write about them, write personal opinions of them or stick them in their books? Everything I’ve asked them to do is related to informing their own designs and nothing more!)
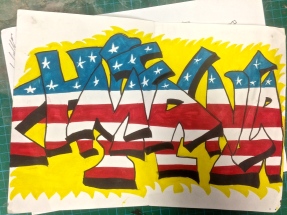
Activity 5: TACTILE CREATIVITY (the best way to teach boys anything!): making a 3D version of their letter
Quesion What is the difference between a 2D object and a 3D object? Which material is best for making a 3D model of your letter? Problem solving. Have ready an assortment of card, polystyrene printing tiles, plasticine or modelling clay etc make trial versions of letters and discuss results. Share success and knowledge learned amingst the group. What worked best and why?
Activity Making 5 part 2. Now draw a 2D letter that you have designed and glue it to a card background. (Teacher may need to dictate a size and demonstrate safe card cutting techniques.) Intervention to support less able by assisting with cutting for example may be needed. More able might make a sign for their bedroom or school for example. The letters should be A5 approx in size. The outcomes should vary enormously in quality but that’s ok. Tell them it might take several attempts to get right. Would simplifying the design help?
Activity 6: DECORATIVE & COLOUR CREATIVITY Painting the letter. Look at the colour wheel and identify three colours you might use. Two must be complimentary (opposite on the wheel) harmonious are three adjacent colours. Some investigation of patterns might be made. Techniques to paint using side or tip of brush should be shown. Decorate using your own preferred techniques learned from lettering study.
In this way I had a wide range of outcome and experiences. pupils had a lot of choice within the exercise and could adapt the outcomes at each stage to suit their own tastes and preferences. They learned from each other and collaborative experience was evident. Pupils took immense pride in what they had done, they brought additional materials in from home such as metallic spray paint and had a real sense of ownership. They couldn’t wait to take them home and I was unable to make a wall display because none were left! By contrast; back to my illuminated lettering display. I announced in assembly that I was taking the display down and pupils were free to come and collect them. Not one person did.
Teaching observational drawing

I’ve always been able to draw realistically. I find it natural and easy, in fact I find it strange that everyone can’t draw. So when I became a teacher I really had to work hard to get into my students heads. I can tell you with absolute certainty that you will only ever get at most twenty-five percent of your class drawing realistically to a very high level. Why? Because not everyone will put the effort and dedication in that they need to master it. They get despondent, lazy and give up.
So why bother teaching everyone to draw in this way then? Well, mankind could draw before it learned to write and this is still true of human babies. Writing is simply a series of shapes anyway, so if you can write your name you can draw. Drawing is a form of expression in the same way that music or dance is. It is an inherent part of being human. We draw to describe thoughts and feelings, we draw for pleasure, we draw for invention and we draw to show and depict our ideas. We don’t have to play a musical instrument to survive but how many people wish they could?
What we have to teach when we teach drawing is that all we can ever do is our own representation of something. The trick of teaching drawing is to extend the belief in your students about what a successful piece of drawing looks like. If all you have shown them is brilliant realism then they will think that realism is the only way to be successful. But if you show them expressive drawing and a wider range of drawing styles they will realise that drawing comes in lots of different types, some messy, some neat, some small, some big etc. Then all you need to do is to link the styles you see in what your students are producing and match it to what you have shown them. You see by doing this you have increased the spectrum of successful outcomes.
Everyone writes in their own way and everyone draws in their own way. Never judge your drawings against anyone else’s, just compare them to your earlier drawings to see if you are improving. But above all else; drawing should be fun. Teaching people solely to draw shells, flowers, plants and things is BORING!!!!
Young people want to draw things they are interested in and they should be encouraged to do so. However, all artists need to draw and sketch from observation to sharpen their eye and develop their skills. Even the master comic book illustrators regularly draw from observation to keep their skills sharp.
Alan Lee, is one of my favourite artists. He drew the sets for Lord of the Rings movies and much of his work was done by sitting in the countryside drawing and painting what he saw, then adapting them into those wonderful paintings of his.
Lorna Evans a games designer from Ubisoft said recently; “We get loads of graduates coming to us with portfolios full of clever computing skills, coding and graphics, but what we need are people who can draw. The first thing we look for is observational drawing, we don’t need people to code, we need them to be able to imagine.
Now here is the shameless advertising bit 🙂
I have developed my own observational drawing programme after years and years of teaching drawing. I got tired of repeating the same lessons every year, saying the same things and seeing the same mistakes made with every new class. So I decided to put together a drawing programme of power points and videos to deliver all the basics of drawing shapes, measuring and shading without me having to do a thing. After many years of refining it it is finally finished.
My How to Draw from Observation programme consists of four stages; Foundation stage for very unconfident artists, Beginner stage to learn important basics, Intermediate stage for developing ability and Advanced stage for creating independent artists. Each stage contains exercises, worksheets and videos.
Assessing drawing is quite difficult but I developed a system based on DIRT methods (Dedicated Improvement Reflective Thinking) where you apply codes to the pupils work instead of writing the same comments over and over. Pupils are given time to read the comments then improve/correct their mistakes. I have also provided examples of drawing at each stage so that assessing drawing becomes so easy that a non-specialist can do it. In fact, the children can assess their own work!
Using the programme in class can be done in several ways:
- You may wish to keep control of the programme by selecting individual lessons to use in your classroom over a set period of time. It has been developed to teach drawing over a long educational timeline. I have used it from year 4 to year 6, and from year 7 to year 9 so there is plenty to keep you busy.
- Another way of using it is to complete the ‘What drawing level am I?’ sheet with each student to gauge where they should begin. Once this has been done each student can monitor his or her own drawing progress. You can simply allocate time each week for drawing and watch them progress, using the assessment tools to mark it.
- An exciting way of delivering the programme is to ‘flip the class’ where the lessons are given as homework, then the class use the skills they have learned at home in class.
Please keep in mind that many of these lessons are skills that can take a long time to master. Children do like to rush things don’t they? However being first finished is not the objective and the thing about teaching drawing is that you have to keep telling them over and over again to go back and work on it a little more. Don’t accept things if they aren’t done properly, but keep your criticisms light and friendly. Use a praise sandwich; praise the work, offer advice, end with praise.
Finally, learning to draw is difficult. I truly believe that anyone can improve their drawing skills with this programme, but it takes time and patience that many children won’t apply. The trick I use is to give the pupils opportunities to draw the things they love drawing. I always allow pupils to draw Marvel comic characters, trucks, cars, cartoons, Manga, horses and princesses so long as they are applying the techniques I have shown them such as measuring, shading etc. Children won’t want to learn if all they are drawing is plants and flowers! They will naturally compare their work to others and get disappointed if it isn’t turning out the way they hoped. This is why you need to encourage, support and praise them as much as you can. Show them how much better they have become and get them enjoying drawing by not being afraid of that artistic struggle!
Download this free presentation about many of the issues young people face when they try to learn to draw!

You can buy a single drawing unit from my website as a download (£5.99), or the whole programme (£19.99). better still, why not get the online drawing programme then your students can teach themselves to draw at their own pace (£39.99).
http://www.paulcarneyarts.com/drawing_lessons.html
Paul
Contemporary drawing
I think drawing is so important and so liberating and that anyone can access drawing regardless of his or her skill level. Contemporary drawing (often much criticised) has the fabulous ability of tapping into the core of our creativity and open up doors in our minds that we thought closed. I’m a convert!!
In 2012 OFSTED published it’s report on drawing Making a mark: art, craft and design 2008-2011. Inspectors found that, despite drawing being a key skill:“teaching all pupils to draw with confidence and creativity was a low priority in too many schools. Teachers’ subject expertise in drawing varied widely, particularly in primary schools.”
Drawing does not have to be for the Gifted. With the minimum amount of expertise you can make drawing inclusive for students of all abilities.
I put an ebook of drawing exercises together to address this problem. The Ebook features twelve activities that stimulate creative and unique approaches to drawing and do not require the student to have realistic drawing skills. Using common, everday resources, not specialist drawing equipment, each exercise links to a contemporary artist so that your students can relate the activity to professional practice.
Get it here: http://www.paulcarneyarts.com/art_lessons.html
The Contemporary drawing Practice exercises are suitable for students in Key Stage 2, 3 or even Key Stage 4. You do not need to be an art specialist to be able to teach these lessons because the children will be able to teach themselves. Just print them out in colour and laminate them. Each exercise contains learning objectives, step by step instructions, full colour photos of artists work, research tasks and extension work.
Contents of the book and page samples:
 Exercise 1; Features Antony Gormley and one of his own unique drawing exercises.
Exercise 2: Uses the amazing work of Jon Burgerman to create Doodle drawings.
Exercise 3: The beautiful text based art of Fiona Banner influences this exercise.
Exercise 4: Julian Opie’s powerful line installations are recreated in a drawing lesson with border roll.
Exercise 5: Dawn Dupree’s highly creative textile art works influence this drawing exercise with glue-guns.
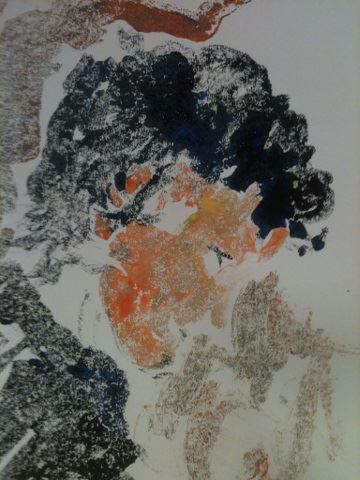
Exercise 6: The powerful and haunting drawings of Emma McNally are used to create drawing with graphite powder.
Exercise 7: Portuguese artist David Oliviera creates amazing drawings with wire and they are used to inspire the children to do their own wire drawings.
Exercise 8: Japanese artist Yayoi Kusama’s drawings are used to influence digital drawings on computers.
Exercise 9: Dutch artist Marian Bijlenga’s beautiful textile art is used to inspire drawing with fabrics and a microscope.
Exercise 10: Marco Maggi’s stunning contemporary art is used to develop drawings using aluminium foil.
Exercise 11: Mandy Barker’s environmental photography is the inspiration behind a great drawing exercise using string and bin liners.
Exercise 12: Peter Freeman’s light installations are the theme behind a lovely exercise using overhead projectors.
Teaching Creativity by Marvin Bartel
I came across Marvin’s website at Goshen in the early 2000’s and I’ve never stopped reading it since! Marvin has inspired me to change my practice, be daring, creative and is responsible for a lot of what I do. Check out his page:
Teaching Drawing
Link Posted on Updated on
Learning how to draw by Paul Carney
Whenever I get a class of art students (of any age) to draw something from observation I always get a wide set of results, ranging from excellent to struggling. That must mean that most students are not working on a level playing field because everyone has differing needs and abilities. And since drawing is a series of complex skills, it is natural to assume that people would prefer to acquire them at varying rates according to their own preferred learning style.
This drawing programme has been designed to cater for those individual learning needs and take the pain and difficulty out of learning to draw or teaching drawing. It is not a magic bullet that will show everyone how to draw without effort in ten minutes. It has been designed to guide you or your students through the stages and steps of how to learn to draw in video and presentations.
It will show you what you can do well already and what you need to do to improve. You will be able to start at the level that you think suits you best then work through it at your own pace, wherever you are able to access it. Learning to draw is difficult. It will take time, effort and dedication, but with this programme you will have a hand to guide you through the process.
The tutorials are aimed at improving the core skills of drawing and have been arranged into four stages. You should firstly complete the self-assessment worksheet that will help you to find out what stage of the drawing programme to begin.
Many students might wish to begin at a particular level but some might assess themselves as beginner in drawing shapes and complete those exercises, but foundation at shading and so complete them first etc.
So really it is up to YOU the student to decide what you need to learn and where you want to begin. What you must do is to complete all of the exercises to a HIGH level and not skip through the bits you don’t like or want to do.
1. Foundation Drawing Stage
For those who would assess their current ability as: ”I can’t even draw a stick man, I’m hopeless.”
As its name suggests, Foundation pre-stage drawing is the level I would place people on who are complete novices. These are the types of people who say that they cannot even draw a stick man. Contained in these tutorials are lessons about how to shade simple shapes, some basic drawing tips and your very first drawing lessons for the stick man artists out there. It might be worth taking a look at this even if you feel that you are more advanced than this stage.
2. Beginner Drawing Stage
For those who would assess their current ability as: “I can draw a little bit, but I’m not very confident. I need lots of help.”
This stage of drawing develops the idea of seeing simple geometry when drawing from observation. It develops more advanced drawing and shading of 3D objects and observational shading to create form. There is also a 3D lettering project that brings all of these skills together.
3. Intermediate Drawing Stage
For those who would assess their current ability as: “I can draw the basics ok, such as drawing outlines of shapes, but I need help with some areas such as how to shade etc.”
Here I show you how to combine geometry, measuring and shading skills from the first two stages into observational drawing of simple still life shapes. This exercise is a classic art lesson but it still holds enormous value because you will attain the important skill of interpreting objects through building line, detail and shading.
4. Advanced Drawing Stage
For those who would assess their current ability as: “I’m quite good at drawing, I draw often, but I want to improve so that I can draw difficult things.” At this level of drawing you are challenged to construct, measure, shade and draw a more complex group of objects, rendering shading and detail with greater accuracy and precision
