Durer Drawing and Printmaking
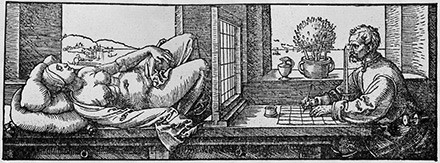
In the Durer illustration above, you can see how he has created a vertical window onto which he has drawn a grid which corresponds to a grid on his paper. He uses this as a kind of real-time tracing method which really helps improve observational drawing for the less able.
My Method:
I devised a simple, modern version of this exercise and adapted it for print.
It requires a thin piece of clear perspex about A3 in size which may or may not be divided into squares using red or blue permanent marker (the squares are great for the less able). The perspex is fixed vertically to the desk using generous blobs of blue tac, but if you are of a technical nature you might create a more sturdy frame and stand. The window is positioned in front of the item to be drawn from observation and the student draws it. You can draw it in two ways;
It requires a thin piece of clear perspex about A3 in size which may or may not be divided into squares using red or blue permanent marker (the squares are great for the less able). The perspex is fixed vertically to the desk using generous blobs of blue tac, but if you are of a technical nature you might create a more sturdy frame and stand. The window is positioned in front of the item to be drawn from observation and the student draws it. You can draw it in two ways;
1. Draw directly onto a sheet of paper and simply use the grid on the perspex to help you divide the object into smaller, more manageable shapes.
Or
2. Draw onto the perspex using a whiteboard marker and create a print. Once the drawing is complete, the perspex is flipped over and placed marker ink side down onto a piece of white paper (so you can see the drawing clearly) and fixed in place with tape.
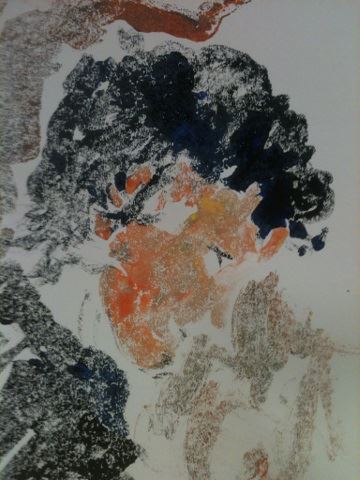
Next, use printing ink (not paint) and a brush, to build layers of coloured onto the perspex. Be careful not to make the ink too thick and not too light or it won’t print properly. You can now can print a few mono prints from the perspex. Once dry, you can work back into the print if you like.

If you wish, you might just want to use the perspex image to make a drawing, rather than a mono print. You can do this by placing the perspex marker side face down onto a piece of paper. The paper is then rubbed gently and the board marker ink is lightly transferred to the paper. If this method isn’t successful, you can trace it and transfer using traditional tracing paper methods or use a light box. From there you can begin drawing over the transferred image.
You can use this printmaking method to create prints from photos. Just place the photo under the acetate and paint the printing ink over to create your own version of it.
You can also use a digital method. Just take a photo of the still life then trace it using an app such as Tracing Paper, Calrisketch, Explain Everything etc. But its much more fun the Dürer way!
This lesson was designed and developed by Paul Carney. Visit http://www.paulcarneyarts.com for more exciting lessons

05/02/2016 at 8:32 pm
Really liked your AD mag article. Hope all is well.
Take care Lou ________________________________
05/02/2016 at 8:35 pm
Hi Lou. Yeah all is well with me. Pottering along working away at a much more manageable pace these days. Teaching was mental!!!! Hope u and the family is well. Thanks for the kind comments on my article x